Introduction
Moving data from cloud storage to databases efficiently is a critical requirement in modern data architectures. Whether you’re building a data warehouse, performing analytics, or synchronizing data across systems, the ability to seamlessly transfer data from Amazon S3 to PostgreSQL is essential.
In this guide, we’ll explore how to use Sling, an open-source data movement tool, to streamline the process of loading Parquet files from Amazon S3 into PostgreSQL databases. Parquet, being a columnar storage format, offers excellent compression and query performance, making it a popular choice for data storage. However, loading Parquet data into PostgreSQL traditionally requires multiple tools and complex configurations.
We’ll cover everything from installation and connection setup to advanced data pipeline configurations, helping you build a robust and efficient data transfer solution.
The Challenge of S3 to PostgreSQL Data Transfer
Traditional approaches to moving Parquet data from S3 to PostgreSQL involve multiple steps and tools, creating complexity and potential points of failure. Let’s look at some common challenges:
Multiple Tools and Dependencies
A typical data pipeline might require:
- AWS CLI or SDK for S3 access
- Apache Arrow or PyArrow for Parquet processing
- PostgreSQL client libraries
- Custom scripts to orchestrate the process
- Additional tools for monitoring and error handling
Sling’s Solution
Sling addresses these challenges by providing:
- A single tool for end-to-end data transfer
- Built-in connection management for both S3 and PostgreSQL
- Efficient Parquet processing with minimal memory footprint
- Automatic schema mapping and type conversion
- Robust error handling and recovery mechanisms
- Progress tracking and monitoring capabilities
In the following sections, we’ll explore how to leverage Sling’s features to build a reliable and efficient data pipeline from S3 to PostgreSQL.
Getting Started with Sling
Let’s begin by installing Sling on your system. Sling provides multiple installation methods to suit different environments and preferences.
Installation Options
Choose the installation method that best fits your environment:
# Install using Homebrew (macOS)
brew install slingdata-io/sling/sling

# Install using curl (Linux)
curl -LO 'https://github.com/slingdata-io/sling-cli/releases/latest/download/sling_linux_amd64.tar.gz' \
  && tar xf sling_linux_amd64.tar.gz \
  && rm -f sling_linux_amd64.tar.gz \
  && chmod +x sling

# Install using Scoop (Windows)
scoop bucket add sling https://github.com/slingdata-io/scoop-sling.git
scoop install sling

# Install using Python pip
pip install sling
For more detailed installation instructions, visit the Sling CLI Getting Started Guide.
Verifying Installation
After installation, verify that Sling is properly installed by checking its version:
# Check Sling version
sling --version
Understanding Sling Components
Sling consists of two main components:
Sling CLI: A powerful command-line tool that you’ve just installed, perfect for:
- Local development and testing
- CI/CD pipeline integration
- Quick data transfers
- Automated workflows
Sling Platform: A web-based interface offering:
- Visual pipeline creation
- Connection management
- Job monitoring
- Team collaboration
- Scheduling capabilities
In this guide, we’ll focus primarily on using the CLI for S3 to PostgreSQL transfers, but we’ll also touch on the platform features that can enhance your data pipeline management.
Setting Up Connections
Before we can start transferring data, we need to configure our source (S3) and target (PostgreSQL) connections. Sling provides multiple ways to manage connections securely.
Setting Up S3 Connection
You can configure your S3 connection using any of these methods:
Using sling conns set Command
# Set up S3 connection using AWS credentials
sling conns set S3 type=s3 access_key_id=YOUR_ACCESS_KEY secret_access_key=YOUR_SECRET_KEY region=us-east-1

# Or use a connection URL
sling conns set S3 url="s3://access_key:secret_key@bucket?region=us-east-1"
Using Environment Variables
# Set S3 connection using environment variables
export AWS_ACCESS_KEY_ID=YOUR_ACCESS_KEY
export AWS_SECRET_ACCESS_KEY=YOUR_SECRET_KEY
export AWS_REGION=us-east-1
Using Sling Environment File
Create or edit ~/.sling/env.yaml:
connections:
  S3:
    type: s3
    access_key_id: YOUR_ACCESS_KEY
    secret_access_key: YOUR_SECRET_KEY
    region: us-east-1
    # Optional settings
    endpoint: https://s3.amazonaws.com  # For custom endpoints
    bucket: your-bucket-name  # Default bucket
For more details about S3 connection configuration, visit the S3 Connection Documentation.
Setting Up PostgreSQL Connection
Similarly, configure your PostgreSQL connection:
Using sling conns set Command
# Set up PostgreSQL connection using individual parameters
sling conns set POSTGRES type=postgres host=localhost user=myuser database=mydb password=mypassword port=5432

# Or use a connection URL
sling conns set POSTGRES url="postgresql://myuser:mypassword@localhost:5432/mydb"
Using Environment Variables
# Set PostgreSQL connection using environment variable
export POSTGRES='postgresql://myuser:mypassword@localhost:5432/mydb'
Using Sling Environment File
Add to your ~/.sling/env.yaml:
connections:
  POSTGRES:
    type: postgres
    host: localhost
    user: myuser
    password: mypassword
    port: 5432
    database: mydb
    schema: public  # optional
For more details about PostgreSQL connection configuration, visit the PostgreSQL Connection Documentation.
Verifying Connections
After setting up your connections, verify them using Sling’s connection management commands:
# List all configured connections
sling conns list

# Test S3 connection
sling conns test S3

# Test PostgreSQL connection
sling conns test POSTGRES

# List available objects in S3
sling conns discover S3
These commands help ensure your connections are properly configured before attempting any data transfers.
Basic Data Transfer with CLI Flags
The quickest way to start transferring data from S3 to PostgreSQL is using Sling’s CLI flags. This method is perfect for simple transfers and testing your setup.
Simple Transfer Example
Here’s a basic example of transferring a single Parquet file from S3 to a PostgreSQL table:
# Transfer a single Parquet file to PostgreSQL
sling run \
  --src-conn S3 \
  --src-stream "s3://my-bucket/data/users.parquet" \
  --tgt-conn POSTGRES \
  --tgt-object "public.users"
Transfer with Options
You can customize the transfer behavior using source and target options:
# Transfer with custom options
sling run \
  --src-conn S3 \
  --src-stream "s3://my-bucket/data/*.parquet" \
  --src-options '{ "empty_as_null": true }' \
  --tgt-conn POSTGRES \
  --tgt-object "public.{stream_file_name}" \
  --tgt-options '{ "column_casing": "snake", "add_new_columns": true }'
In this example:
empty_as_null: Treats empty values as NULL in the source datacolumn_casing: Converts column names to snake_case in PostgreSQLadd_new_columns: Automatically adds new columns if they appear in the source data{stream_file_name}: A runtime variable that uses the source file name as the target table name
Advanced CLI Usage
Here are more examples showcasing different CLI features:
Filtering and Transforming Data
# Use custom sql (powered by DuckDB)
sling run \
  --src-conn S3 \
  --src-stream "select id, amount, date, replace(name, '-', '_') as name
    from read_parquet('s3://my-bucket/data/transactions.parquet')
    where unit not in ('single')" \
  --tgt-conn POSTGRES \
  --tgt-object "analytics.transactions" \
  --tgt-options '{ "table_keys": { "primary": ["id"] } }'
Handling Multiple Files
# Transfer multiple Parquet files with pattern matching
sling run \
  --src-conn S3 \
  --src-stream "s3://my-bucket/data/2024/*.parquet" \
  --tgt-conn POSTGRES \
  --tgt-object "raw.events" \
  --mode incremental \
  --tgt-options '{ "table_ddl": "create table if not exists raw.events (id int, event_type text, timestamp timestamptz)" }'
Setting Load Mode
# Full refresh mode with pre-SQL
sling run \
  --src-conn S3 \
  --src-stream "s3://my-bucket/daily/users.parquet" \
  --tgt-conn POSTGRES \
  --tgt-object "public.users" \
  --mode full-refresh
For more details about CLI flags and options, visit the CLI Flags Documentation.
Advanced Data Transfer with Replication YAML
While CLI flags are great for quick transfers, YAML-based replication configurations offer more control and are better suited for production environments. They allow you to define complex data pipelines with multiple streams, transformations, and options.
Basic YAML Configuration
Let’s start with a simple example. Create a file named s3_to_postgres.yaml:
source: S3
target: POSTGRES

defaults:
  mode: full-refresh
  target_options:
    add_new_columns: true
    column_casing: snake

streams:
  # Single file transfer
  s3://my-bucket/data/users.parquet:
    object: public.users
    primary_key: [id]
    columns:
      id: int
      name: string
      email: string
      created_at: timestamp
Run the replication with:
# Execute the replication
sling run -r s3_to_postgres.yaml
Advanced YAML Configuration
Here’s a more complex example showcasing various features:
source: S3
target: POSTGRES

defaults:
  mode: incremental
  source_options:
    empty_as_null: true
  target_options:
    add_new_columns: true
    column_casing: snake
    table_keys:
      primary: [id]
      unique: [email]

env:
  DATA_DATE: '2024-01-06'

streams:
  # Multiple files with pattern matching
  "users/*.parquet":
    object: raw.users_{stream_file_name}
    mode: full-refresh
    columns:
      id: int
      name: string
      email: string
      status: string
      created_at: timestamp

  # Daily data with runtime variables
  "daily/{DATA_DATE}/transactions.parquet":
    object: analytics.daily_transactions
    mode: incremental
    primary_key: [transaction_id]
    update_key: updated_at
    columns:
      transaction_id: string
      user_id: int
      amount: decimal
      status: string
      created_at: timestamp
      updated_at: timestamp
    target_options:
      table_ddl: |
        create table if not exists analytics.daily_transactions (
          transaction_id text primary key,
          user_id int,
          amount decimal,
          status text,
          created_at timestamptz,
          updated_at timestamptz
        )

  # Multiple files with transformations
  "events/**/*.parquet":
    object: analytics.events
    mode: incremental
    single: true
    columns:
      event_id: string
      event_type: string
      user_id: int
      properties: json
      timestamp: timestamp
    target_options:
      batch_limit: 10000
      table_keys:
        primary: [event_id]
Let’s break down the key features in this configuration:
Environment Variables
env:
  DATA_DATE: '2024-01-06'
  BUCKET_NAME: my-bucket
These variables can be referenced in stream configurations using ${VAR_NAME} syntax.
Default Options
defaults:
  mode: incremental
  source_options:
    empty_as_null: true
  target_options:
    add_new_columns: true
    column_casing: snake
These settings apply to all streams unless overridden.
Stream Configurations
Pattern Matching:
"users/*.parquet":
  object: raw.users_{stream_file_name}
Uses wildcards to match multiple files and runtime variables for dynamic table names.
Incremental Loading:
mode: incremental
primary_key: [transaction_id]
update_key: updated_at
Configures incremental loading based on an update key.
Schema Definition:
columns:
  transaction_id: string
  amount: decimal
Explicitly defines column types.
Table Creation:
target_options:
  table_ddl: |
    create table if not exists...
Automatically creates tables with specific schemas.
Data Transformations:
transforms:
  properties: parse_json
  timestamp: to_timestamp
Applies transformations to specific columns.
For more details about replication configuration, visit:
- Replication Structure Documentation
- Source Options Documentation
- Target Options Documentation
- Runtime Variables Documentation
Using the Sling Platform
While the CLI is powerful for local development and automation, the Sling Platform provides a user-friendly web interface for managing your data pipelines. It offers features like visual pipeline creation, monitoring, and team collaboration.
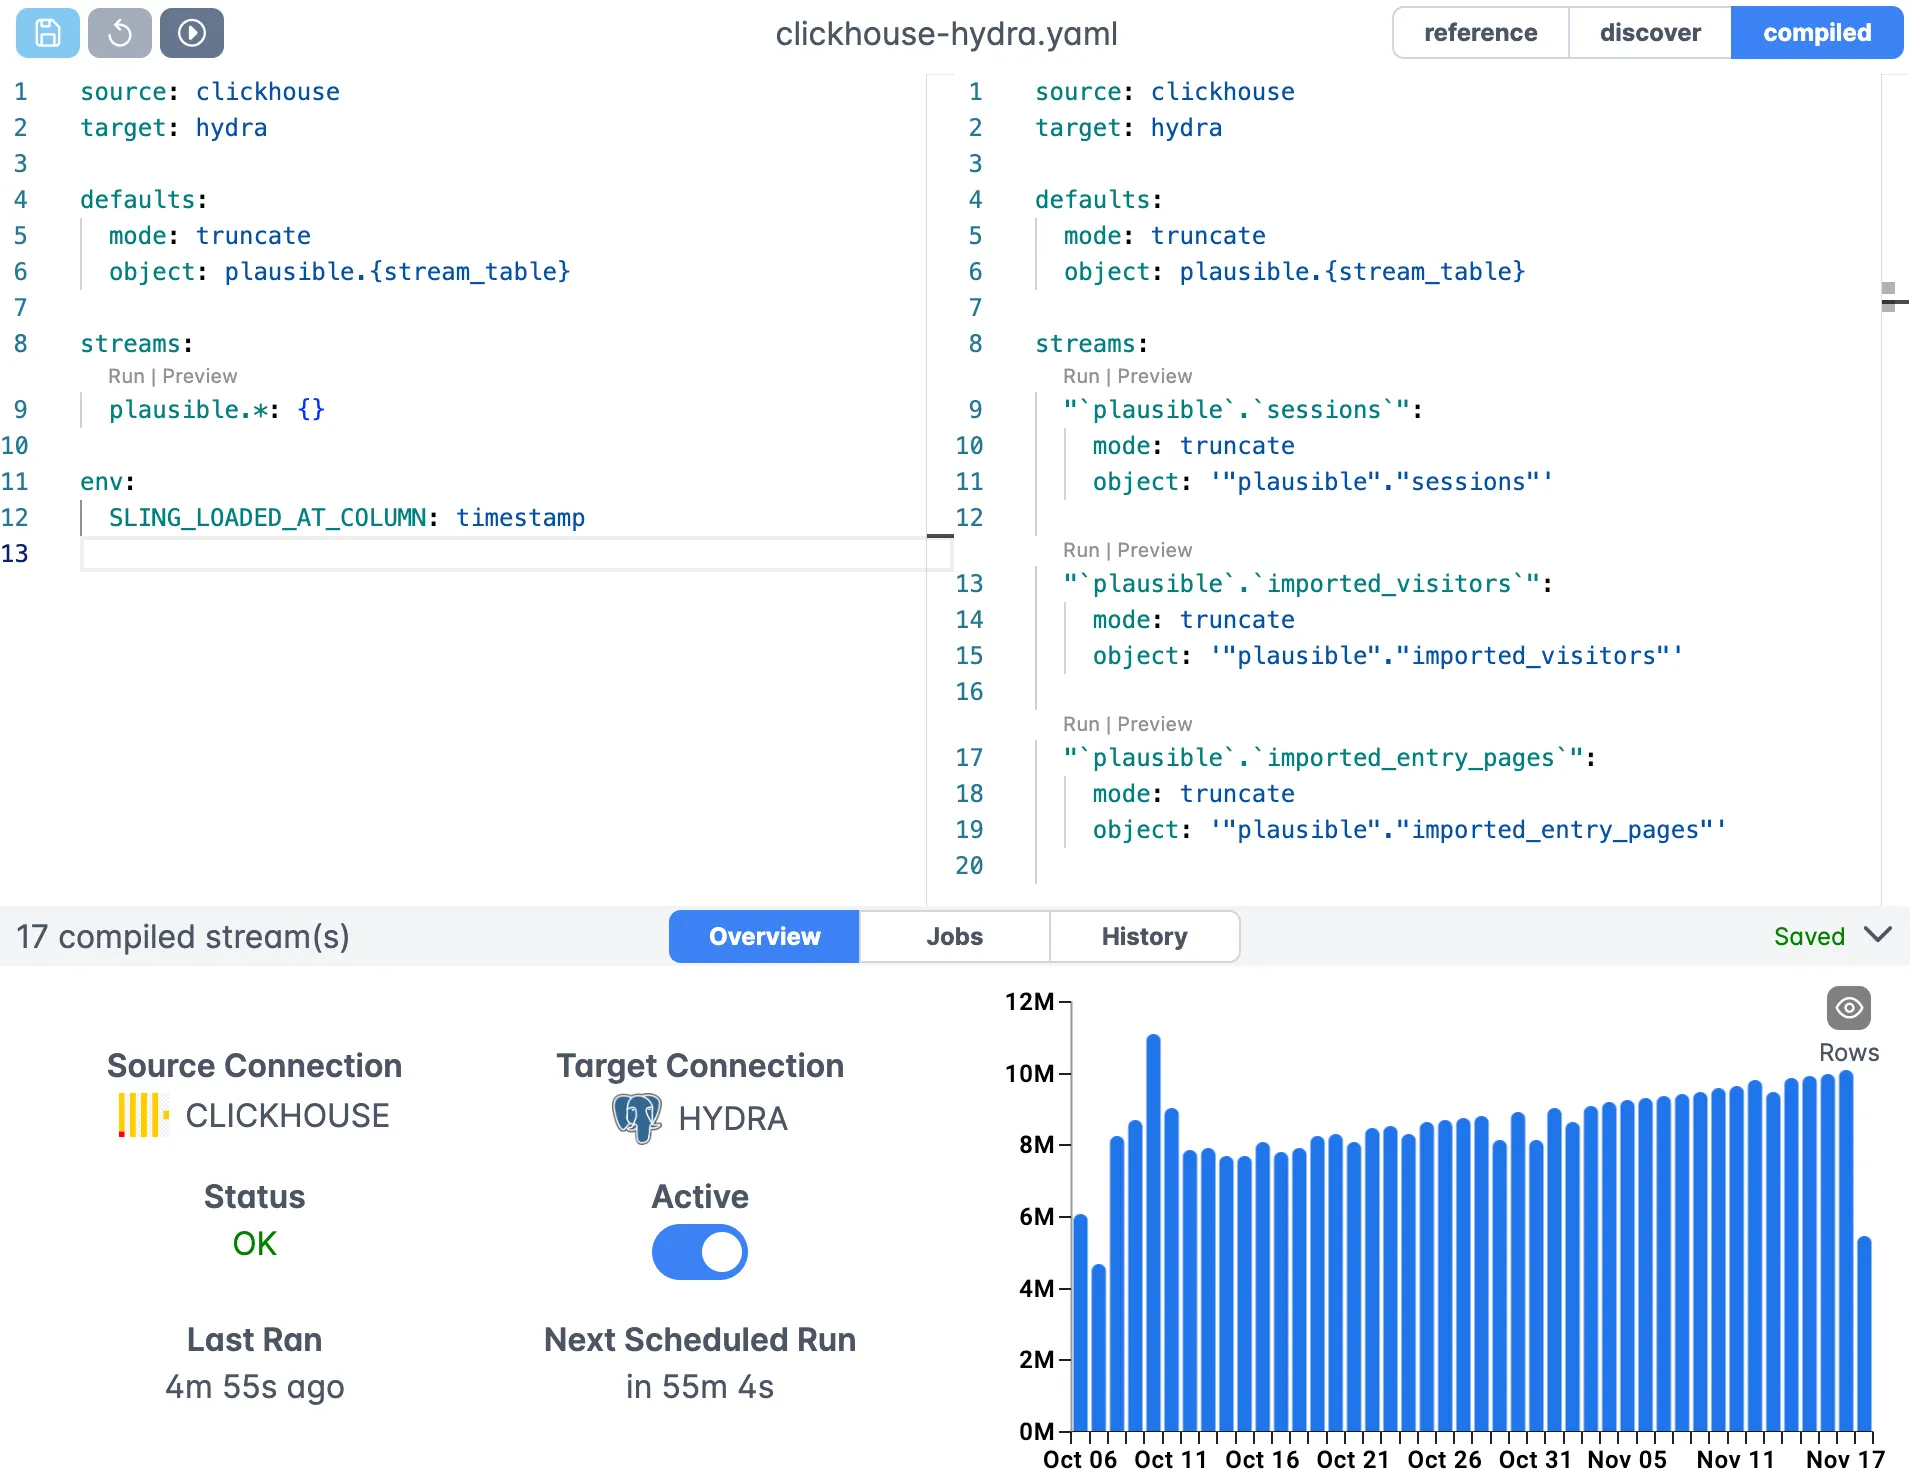
Visual Pipeline Editor
The Sling Platform includes a visual editor for creating and managing your data pipelines:

Key features of the editor include:
- Visual stream configuration
- Syntax highlighting for YAML
- Real-time validation
- Connection management
- Version control integration
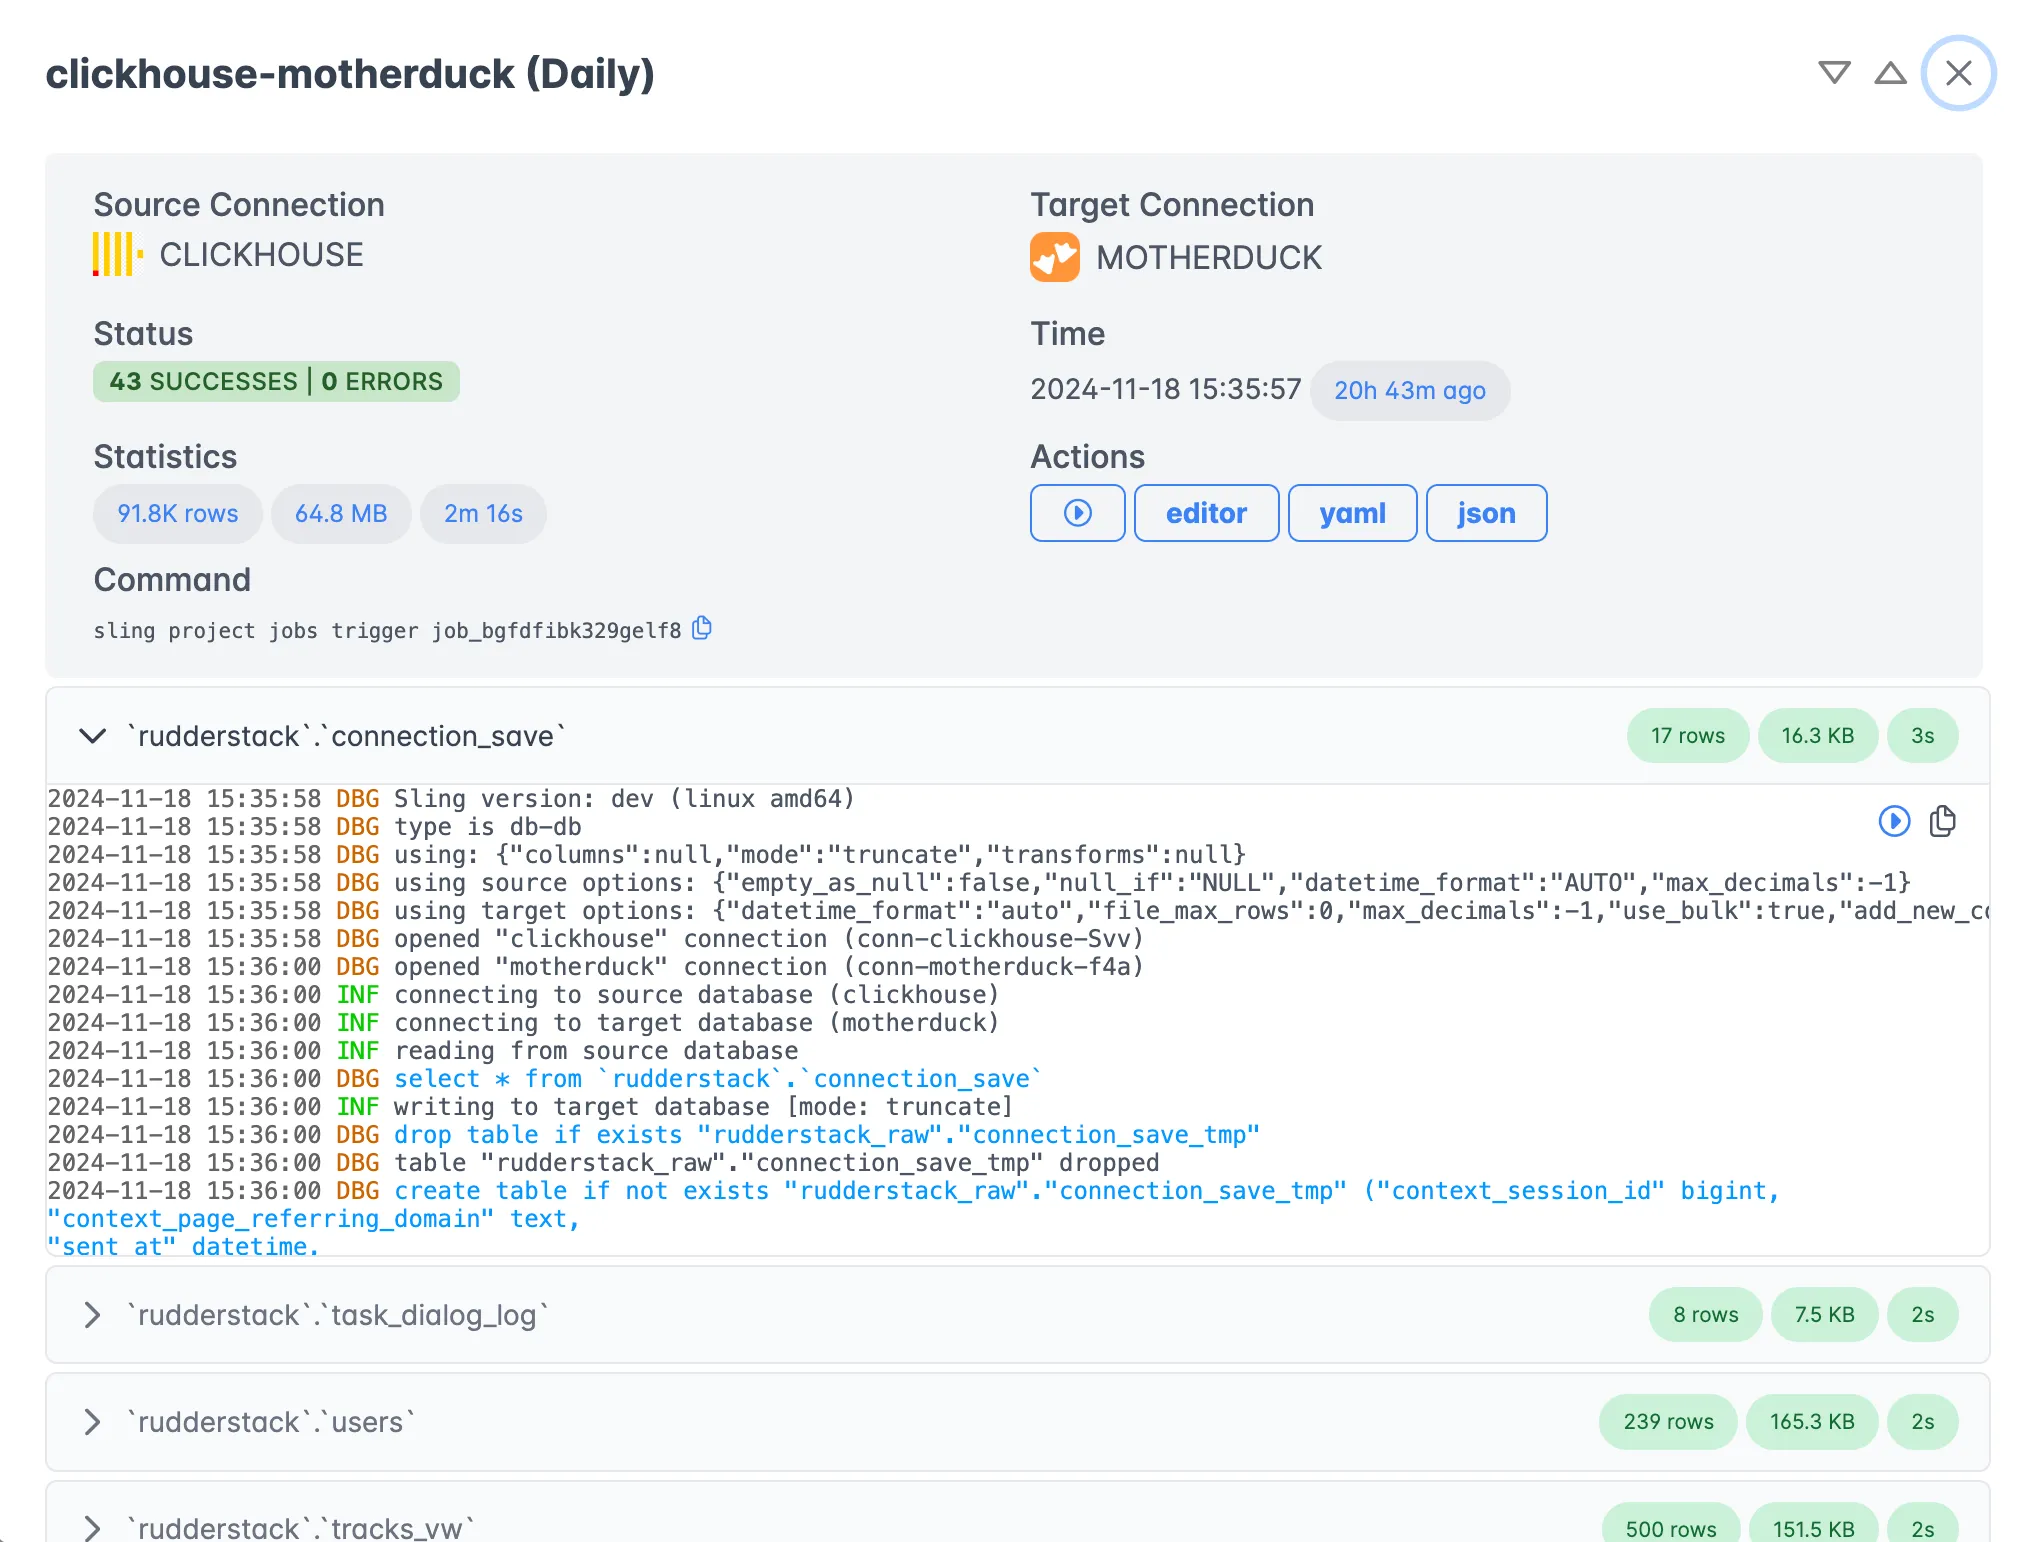
Execution Monitoring
Monitor your data transfers in real-time with detailed progress and performance metrics:

The execution view provides:
- Real-time progress tracking
- Detailed performance metrics
- Error reporting and logs
- Historical execution data
- Resource utilization stats
Platform Benefits
The Sling Platform offers several advantages over CLI-only usage:
Team Collaboration
- Shared connection management
- Role-based access control
- Pipeline version history
- Collaborative debugging
Monitoring and Alerting
- Real-time pipeline status
- Performance metrics
- Error notifications
- Custom alerts
Scheduling and Orchestration
- Visual schedule creation
- Dependency management
- Retry configurations
- Event-based triggers
Enterprise Features
- Audit logging
- Resource management
- SLA monitoring
- Support for multiple environments
Getting Started with the Platform
To start using the Sling Platform:
- Sign up at platform.slingdata.io
- Create your organization
- Install and configure Sling agents
- Set up your connections
- Create your first pipeline
For more details about the platform features, visit the Sling Platform Documentation.
Getting Help and Next Steps
Now that you’ve learned how to use Sling for transferring Parquet data from S3 to PostgreSQL, here are some resources and next steps to help you get the most out of Sling.
Documentation Resources
- Sling CLI Documentation - Detailed CLI usage and examples
- Sling Platform Documentation - Platform features and guides
- Replication Documentation - In-depth replication concepts
- Connection Documentation - Connection configuration guides
Example Use Cases
Explore more Sling examples:
Best Practices
Connection Management
- Use environment variables for sensitive credentials
- Regularly rotate access keys
- Follow the principle of least privilege
Performance Optimization
- Use appropriate batch sizes
- Configure compression settings
- Monitor resource utilization
Error Handling
- Implement proper logging
- Set up alerts for failures
- Plan for recovery scenarios
Maintenance
- Keep Sling updated
- Monitor disk space
- Clean up temporary files
For more examples and detailed documentation, visit docs.slingdata.io.


